Wordsearch Clock
The Idea
Everyone into electronics makes a clock at some point, and I guess this is my turn. The standard word clock is well documented, and commercially available online.
I didn’t want to make the same word clock as everyone else though, so I put my own spin on it. Why have a static clock that displays fixed, always readable words, when you could make something more visually interesting?
The Plan
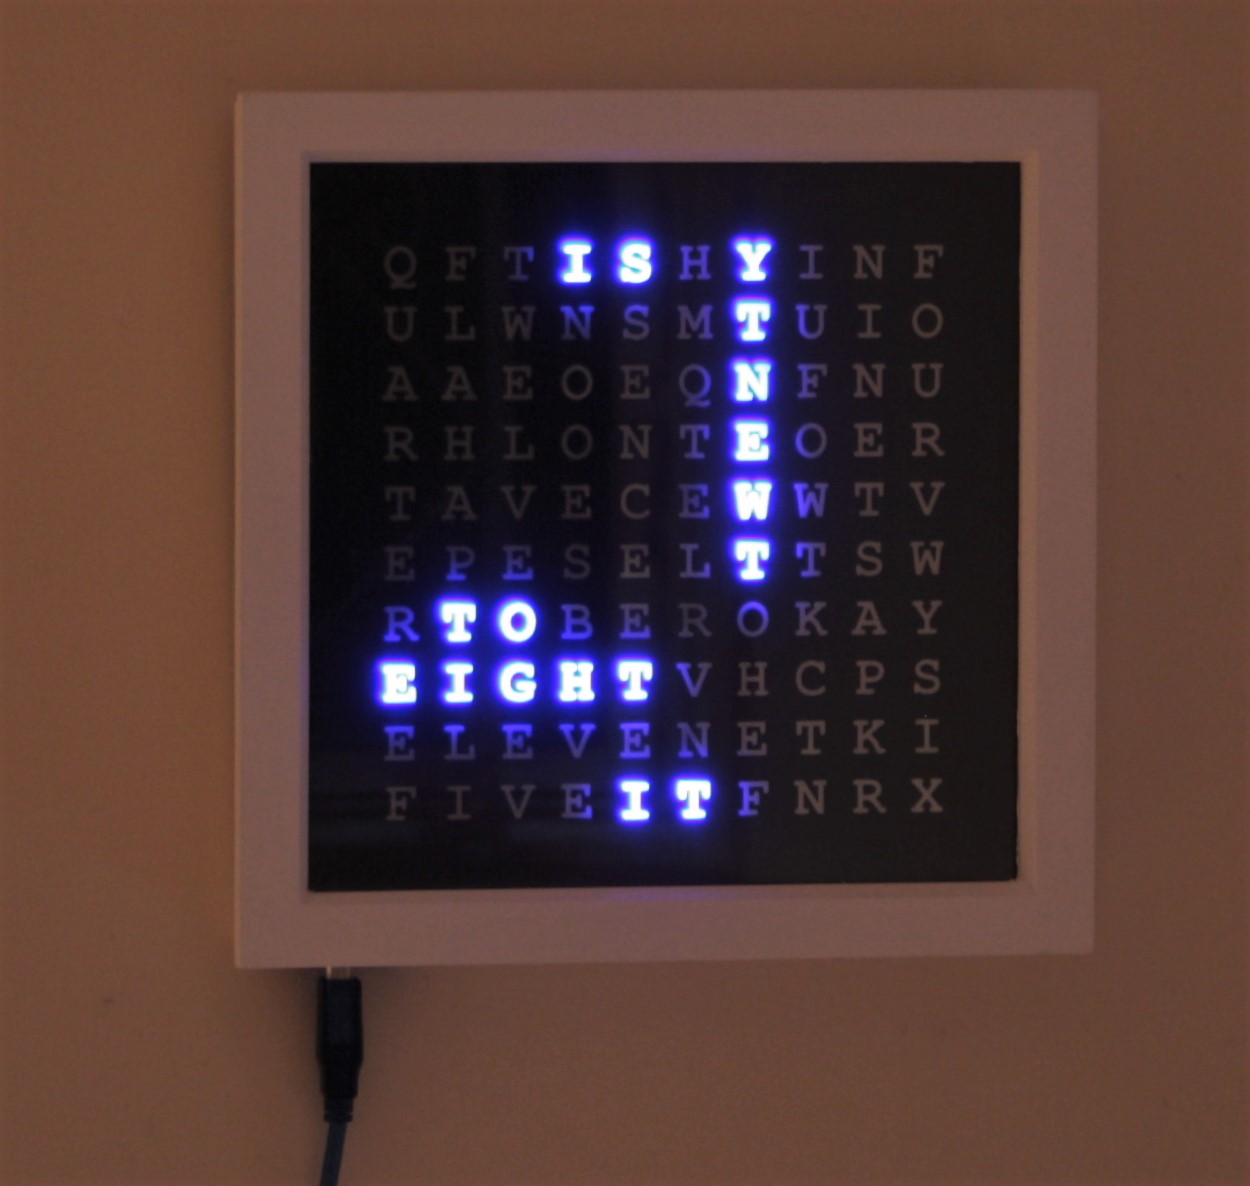
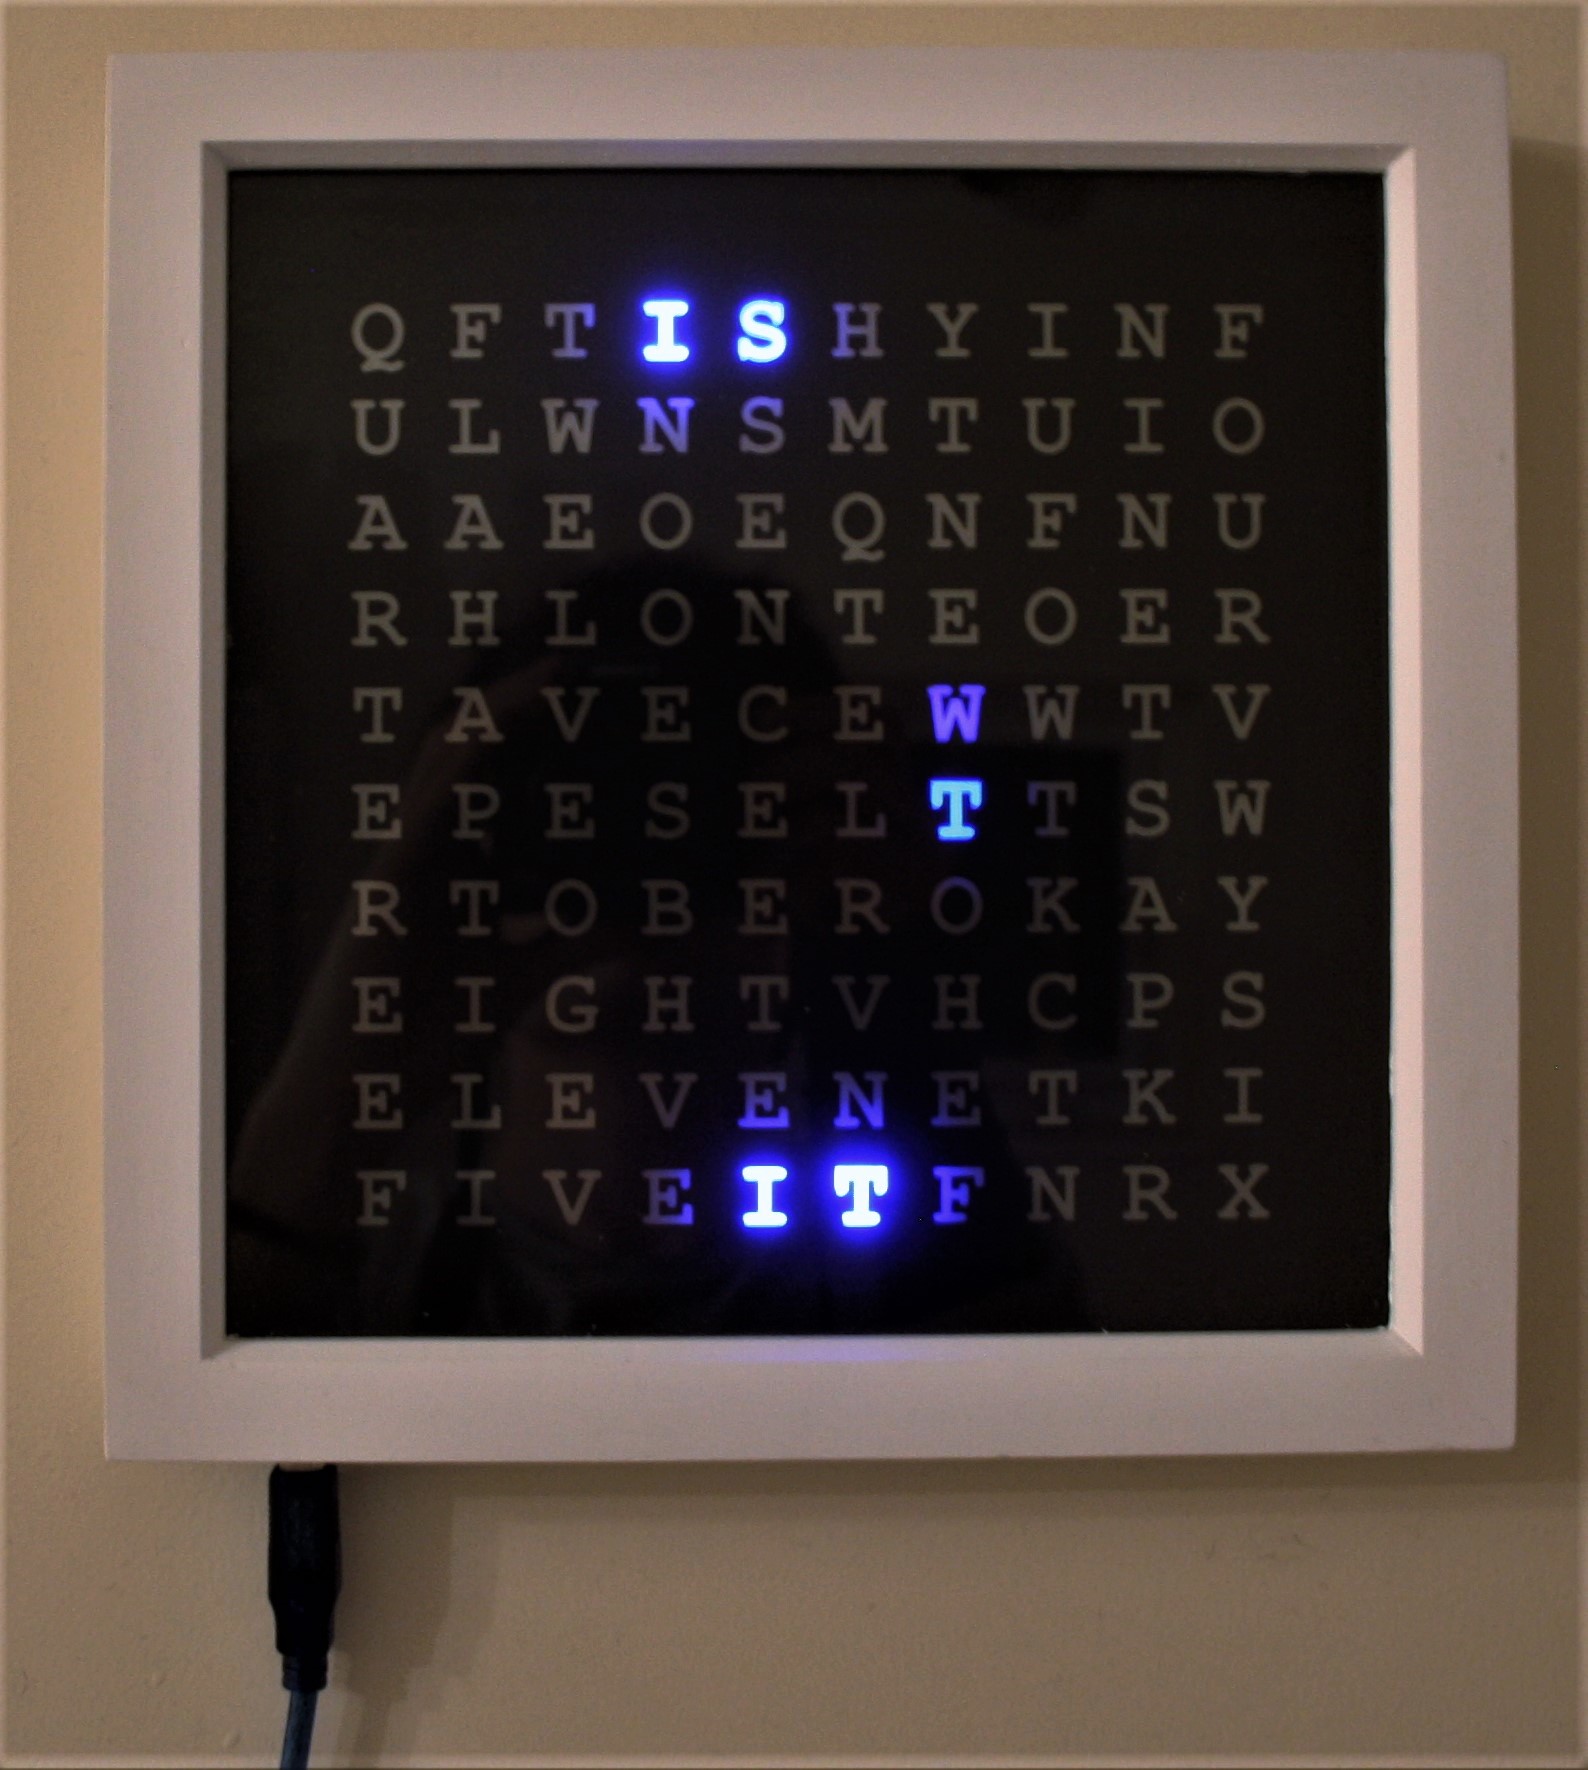
I wanted to make a clock that looked like a regular wordsearch puzzle, which appears to “solve itself” in order to display the time.
Originally I had the idea that the words could share as many letters as possible, in order to minimise the number of letters on the clock face and hence the number of LEDs required.
As the design progressed, I came to the conclusion that sharing letters between words made the clock less readable, and so I settled on a 10 x 10 grid. I used a preexisting online tool to create my wordsearch, ensuring that few letters were shared. I wanted to have the same precision as a typical word clock, so I put in the words required to make all of the sentences describing the time to the nearest 5 minutes.
Once I had a layout that I was happy with, I took the grid arrangement (and the solutions), and wrote a Processing sketch to prove the concept before moving to hardware. This enabled me to visualise the grid arrangement and to tweak the way in which I wanted the animations to work, and was super useful to the development process. It also helped me to grasp the control logic for a clock like this, and figure out the way that a raw time had to be manipulated to catch all the weird edge cases.
After much tweaking, I got to a point where I could move forward with the hardware.
The Hardware
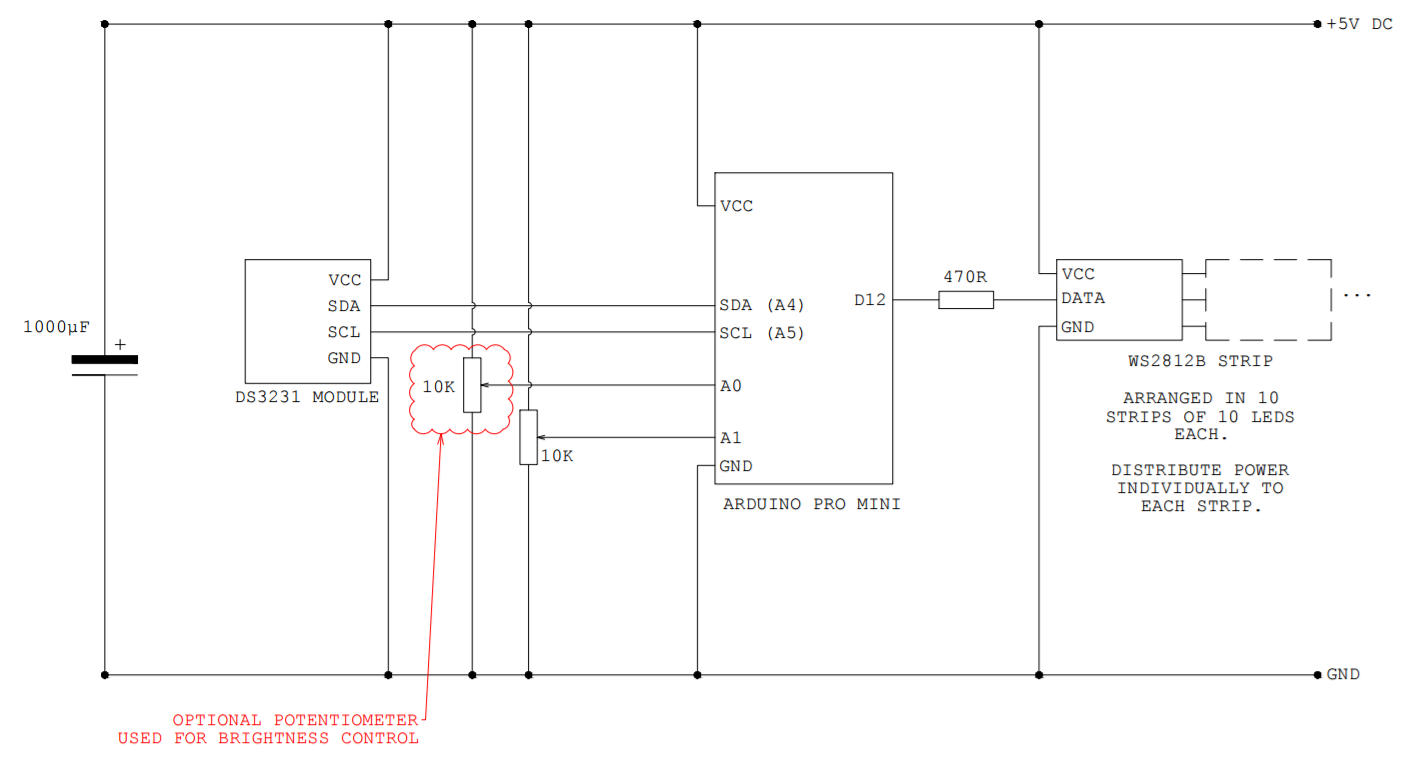
From having read the builds of many other word clocks, I had a fair idea what was going to go into mine. I wanted the ability to change the colour of the LEDs, and since I was going to need 100 of them, the WS2812Bs seemed to be a natural choice. This allowed me to drive the LEDs with only one microcontroller pin.
Given the size constraints I was working to, I chose a 60 LED per m self-adhesive strip. This works out at 16.7mm between LEDs, which was the perfect separation between letters to fit in the frame I bought! For a microcontroller, I settled upon an Arduino Pro Mini (or at least a cheap clone of one), as I knew space inside the frame would be severely restricted and I wouldn’t need an enormous amount of processing power. I also went for a DS3231 RTC module to allow for accurate, backed up timekeeping.
Since I wanted the user to be able to select the colour of the LEDs to suit their mood/decor, I also thew in a 10k potentiometer which could sit on the back or side of the clock.
The Software
There’s a variety of libraries available to control WS2812Bs, but I went with FastLED due to its fast math functions, global brightness and general ease of use. Along with FastLED, I used this DS3231 Library to communicate with the RTC, and then ported over the logic for the clock control over to the Arduino from Processing. I had to make a few changes (porting from Java to C++) to allow for the lack of variable size arrays.
The Rest
The other bits and pieces involved in the build are a regular box picture frame (from Wilkinsons, but a lot of people use Ikea’s RIBBA frame) and mask/diffuser combo for the lettering. The lettering is printed on multiple layers of OHP transparency film, and a sheet of thick tracing paper acts as a diffuser behind this. I had doubts that this approach would work, but I was pleasantly surprised!
The grid of letters was laid out using a modified version of my original Processing sketch. This gave me accurate and scriptable control of the layout of the letters. The sketch spat out a PDF that was then printed at the correct size for the picture frame (top tip: print a few on paper first to find the print settings you need before going on to the transparency film).
To stop the light leaking between adjacent letters, I added in a series of cardboard strips to isolate the LEDs from one another. This was later replaced with a 3D printed rectangular grid, when I bought a 3D printer.
Tips
If you’re going to make one of these, here’s a few tips I’d give:
- Use more than one instance of the words ‘five’ and ‘ten’. It can be quite confusing to decipher the time if it is (for example) 5:05 without this.
- To ensure that the LEDs align with the letters on the transparency properly, glue them on top of a paper print out of the same letter grid to help positioning.
- Plan your component layouts for the electronics properly before soldering everything. I made it up as I went along and it definitely made it more difficult.
- Break out the header pins for programming the Arduino to be easily accessible for reprogramming without opening up the case.